Best Photo Retouching Techniques Photoshop Tutorial | Frequency Separation Skin Retouching
Best Photo Retouching Techniques Photoshop Tutorial | Ultimate Skin Retouching Techniques. Skin Retouching Quick Frequency Separation Techniques in Photoshop. The Amazing Ultimate Frequency Separation Retouching in Photoshop. How to Ultimate Skin Retouching Technique in Photoshop - High-End Retouching skin Sculpting in Photoshop CC or any Other Version. Let's Enjoy this Tutorial and learn Ultimate Retouching Best Techniques In Photoshop. #SkinRetouching #FrequencySeparations #glamourretouching
What is Photo Retouching?
Photo retouching is the process of altering an image to prepare it for the final presentation. Retouches typically perform actions that are small localized adjustments to an image. The terms ‘editing’ and ‘retouching’ are used quite often in the photography world but can mean wildly different things.
#SkinRetouchingPhotoshop #skinRetouching #RetouchingPhotoshop
How to Frequency Separation Skin Retouching?
This post, I will show on How to Ultimate High end Retouching Techniques in Photoshop.
Best Photo Retouching Techniques Photoshop Tutorial || Frequency Separation Skin Retouching
Step-1:
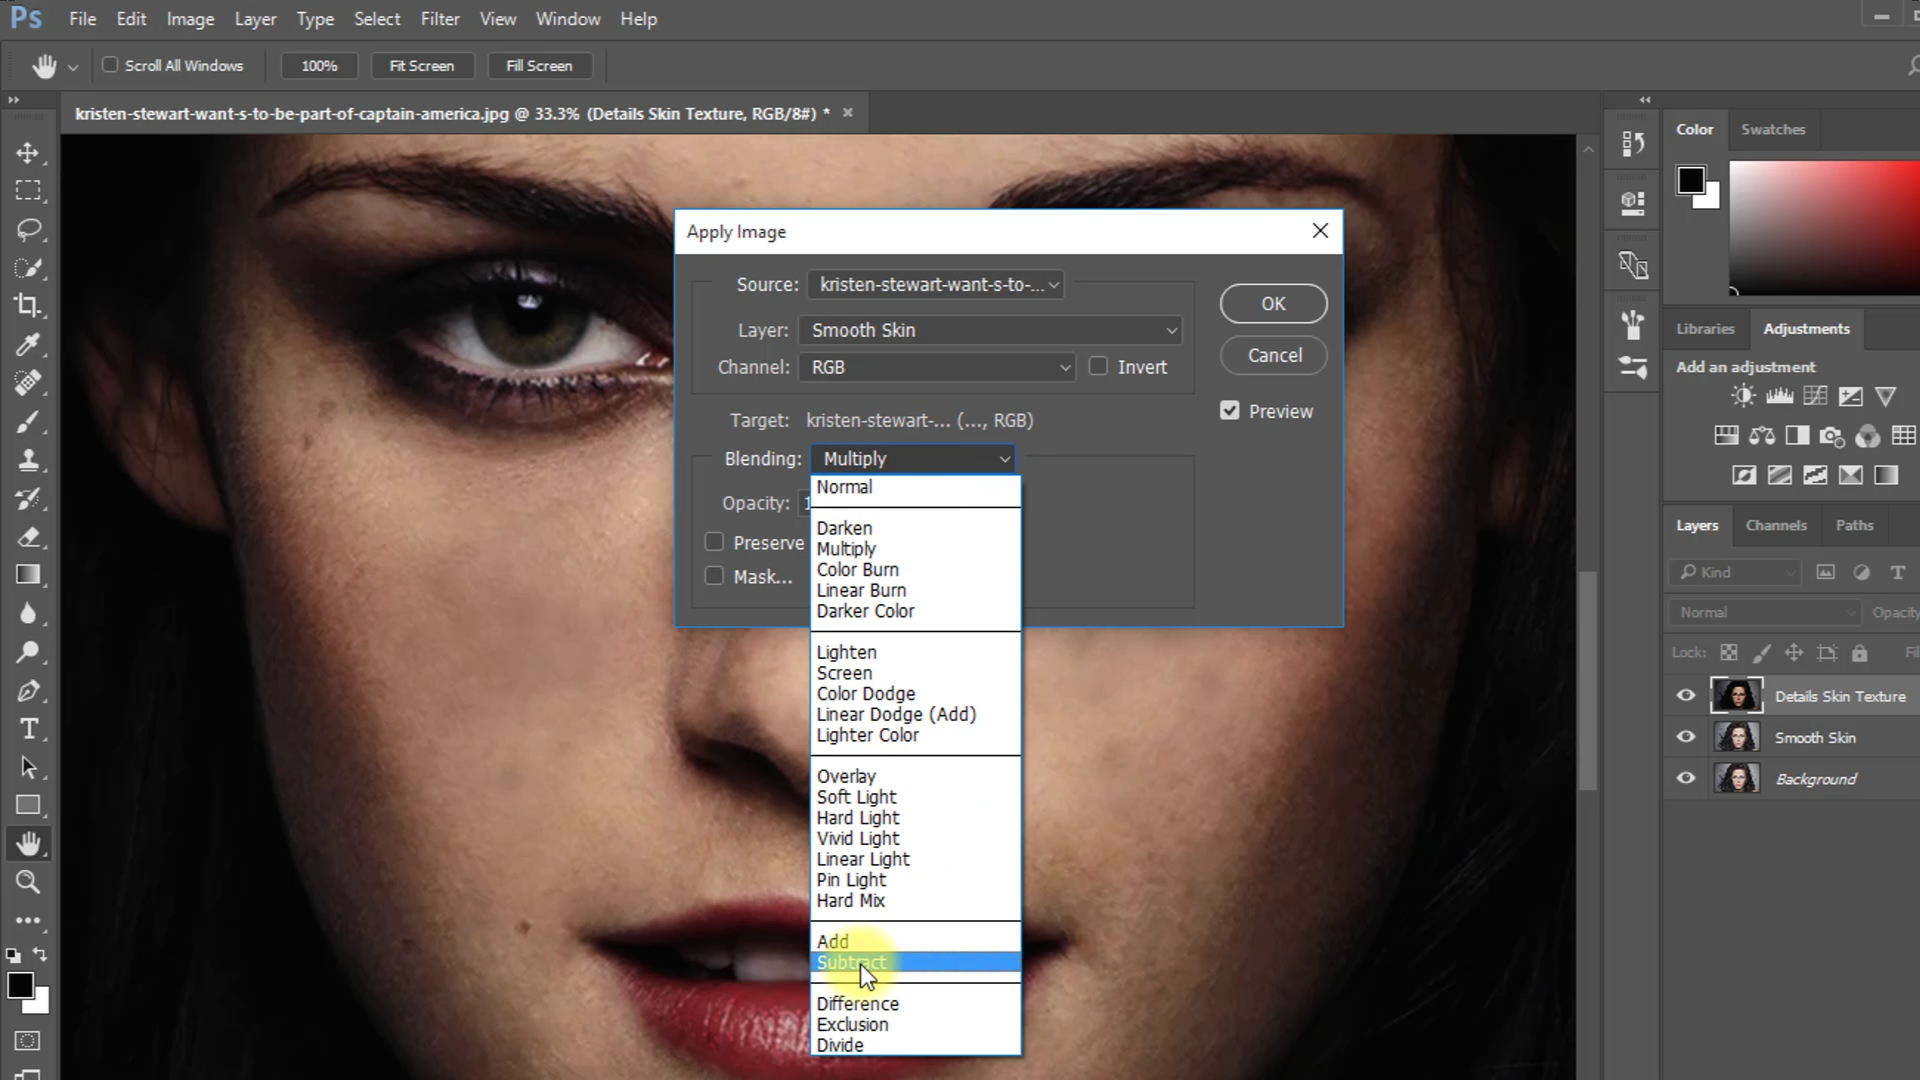
Firstly open your image in Photoshop. This image I want to make Ultimate High-End Retouching. Manually 2 times Copy this Layer Or Press CTRL+J. Rename these 2 layers first layer is Details Skin Texture and the second layer is Smooth skin. Now select Smooth skin layer then go to filter then Blur then Gaussian Blur. Now select Details Skin Texture layer then go to the image then apply the image.
Step-2:
Here is Layer select to Smooth Skin, Blending Select to Subtract and Scale is 2, and Offset is 128 then OK. Follow my Next Work carefully. Now select from Blend mode Linear Light. Now select your Smooth skin layer and Convert to Smart Object. Select this layer and go to filter then Blur then Gaussian Blur. Now select Smart Filter then manually go to the image then adjustments then Invert or Press CTRL+I.
Step-3:
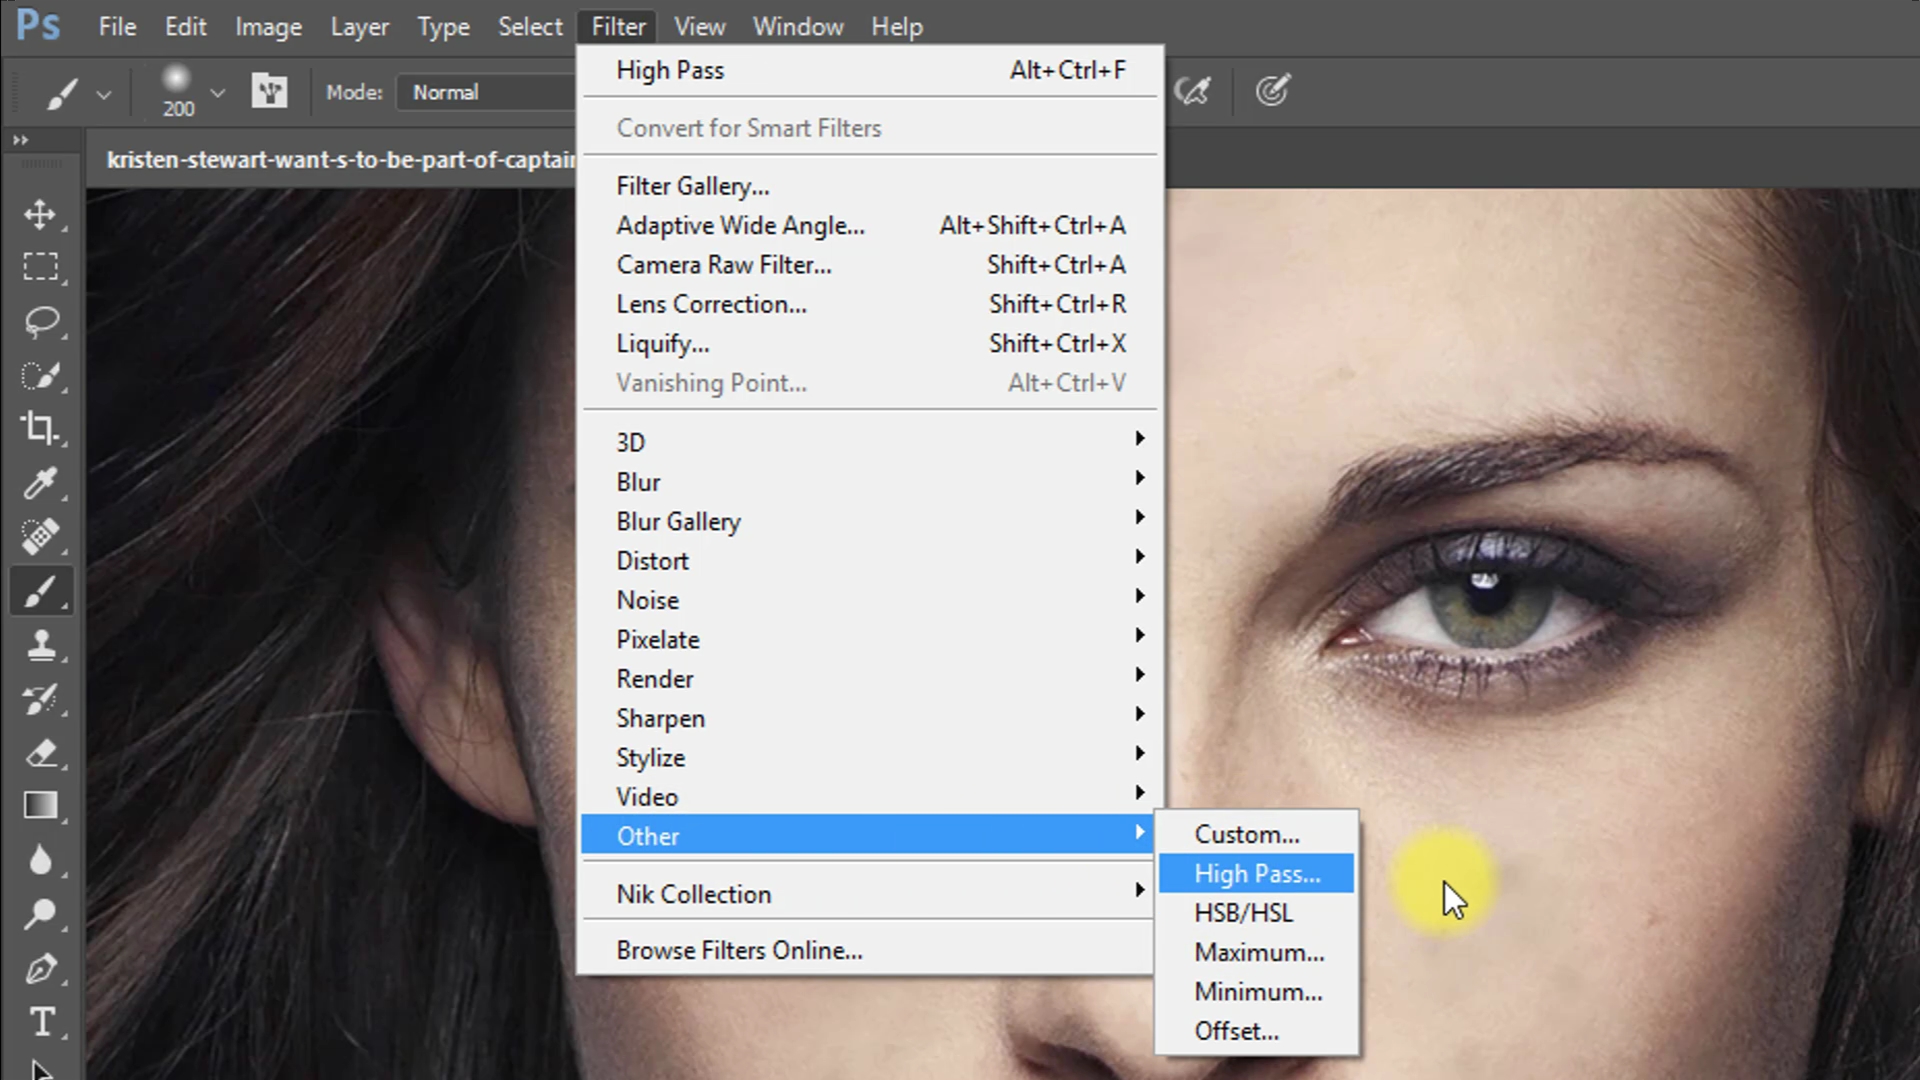
Now select this smart filter and make sure to select Brush Tool and must be select your foreground color is white and opacity is low then use on face for smooth skin. Now copy this layer and drag to top for sharpness skin. Select this layer then go to filter then Other then High pass. then from blend mode select linear light. Now select your sharpness skin layer and Hold Alter key and Mask this layer.
Step-4:
Select the Brush tool and make sure to foreground color is White and apply on face. Now select your top of the layer and Press ALT+CTRL+SHIFT+E for applying the Current image. Now Remove spot skin. Use the Spot healing tool and Patch tool for removing your Skin Spot. Now apply color balance for more effective.
Working Screenshots Below:
Thanks for watching my full tutorial post. Thanks for Learning with this blog. I hope you like this tutorial. please like comment and share this video. thank you!
See Another Related post
Special Retouching Image Tutorials
1-Min Photoshop Tricks
Photoshop Essentials Tutorial
SHARE THIS POST FOR MORE UPDATES
Model Image DOWNLOAD
Retouching Photoshop Actions DOWNLOAD
Watch the Video Tutorial:
"Big ideas, Great results."
Shazim Creations
Thank You For Visiting!
Shazim Creations
Thank You For Visiting!


0 Comments